~ 5 min read
How to block LAN clients from accessing YouTube and other media with AdGuard and Home Assistant

I use Home Assistant to manage my smart home devices and AdGuard Home to block ads, lower bandwidth consumption, and generally manage DNS filters and denylists on my network. I recently wanted to block specific LAN client IPs from accessing YouTube and other media sites.
When you have kids, setting parental controls is a must :-)
Parental controls with AdGuard and Home Assistant
My Home Assistant has AdGuard installed via an add-on and I use it as my primary DNS server with the main home router pointing to it, and using DNS over HTTPS (DoH) to Cloudflare, Google and Quad9 as upstream DNS servers.
AdGuard comes with its own set of filters and client lists that you can use to block ads, trackers, and other unwanted content. More than anything else though, you can configure whats called “Persistent Client” and set them up to adhere to a specific policy, which is really handy for setting up parental controls.
Persistent clients have the following attributes and capabilities:
- You can identify clients by their IP address, MAC address, or even specific tags, for example if you want to target all clients that are tagged as an Android device, or a game console.
- Once identified you can assign them a policy such as:
- Use AdGuard browsing security web service
- Use AdGuard parental control web service
- Block specific services or websites such as YouTube, Facebook, Tiktok, etc.
- Maintain a scheduled-based policy, for example, block YouTube from 8 pm to 8 am
- Use a custom upstream DNS server
If all you want is to manually control the persistent client policy and managing it through the Home Assistant’s AdGuard add-on web UI then that’s all you need to do. However, if you want to automate the process and manage it through Home Assistant’s automation engine controlled via its Lovelace web dashboard, then you need to use the AdGuard Home API.
Configure AdGuard Home add-on in Home Assistant to expose the web service
By default, the AdGuard add-on only sets up port 53 for DNS. If you want to use the API you need to enable the web service in the add-on configuration.
In Home Assistant, go to Settings -> Add-ons -> AdGuard Home -> Configuration and configure it the following way:
- Set
sslto disabled (unless you actually have acertfileandkeyfileto use, otherwise just disable ssl) - Set
portto3000for the80/tcpport mapping
Then restart the add-on to apply the changes.
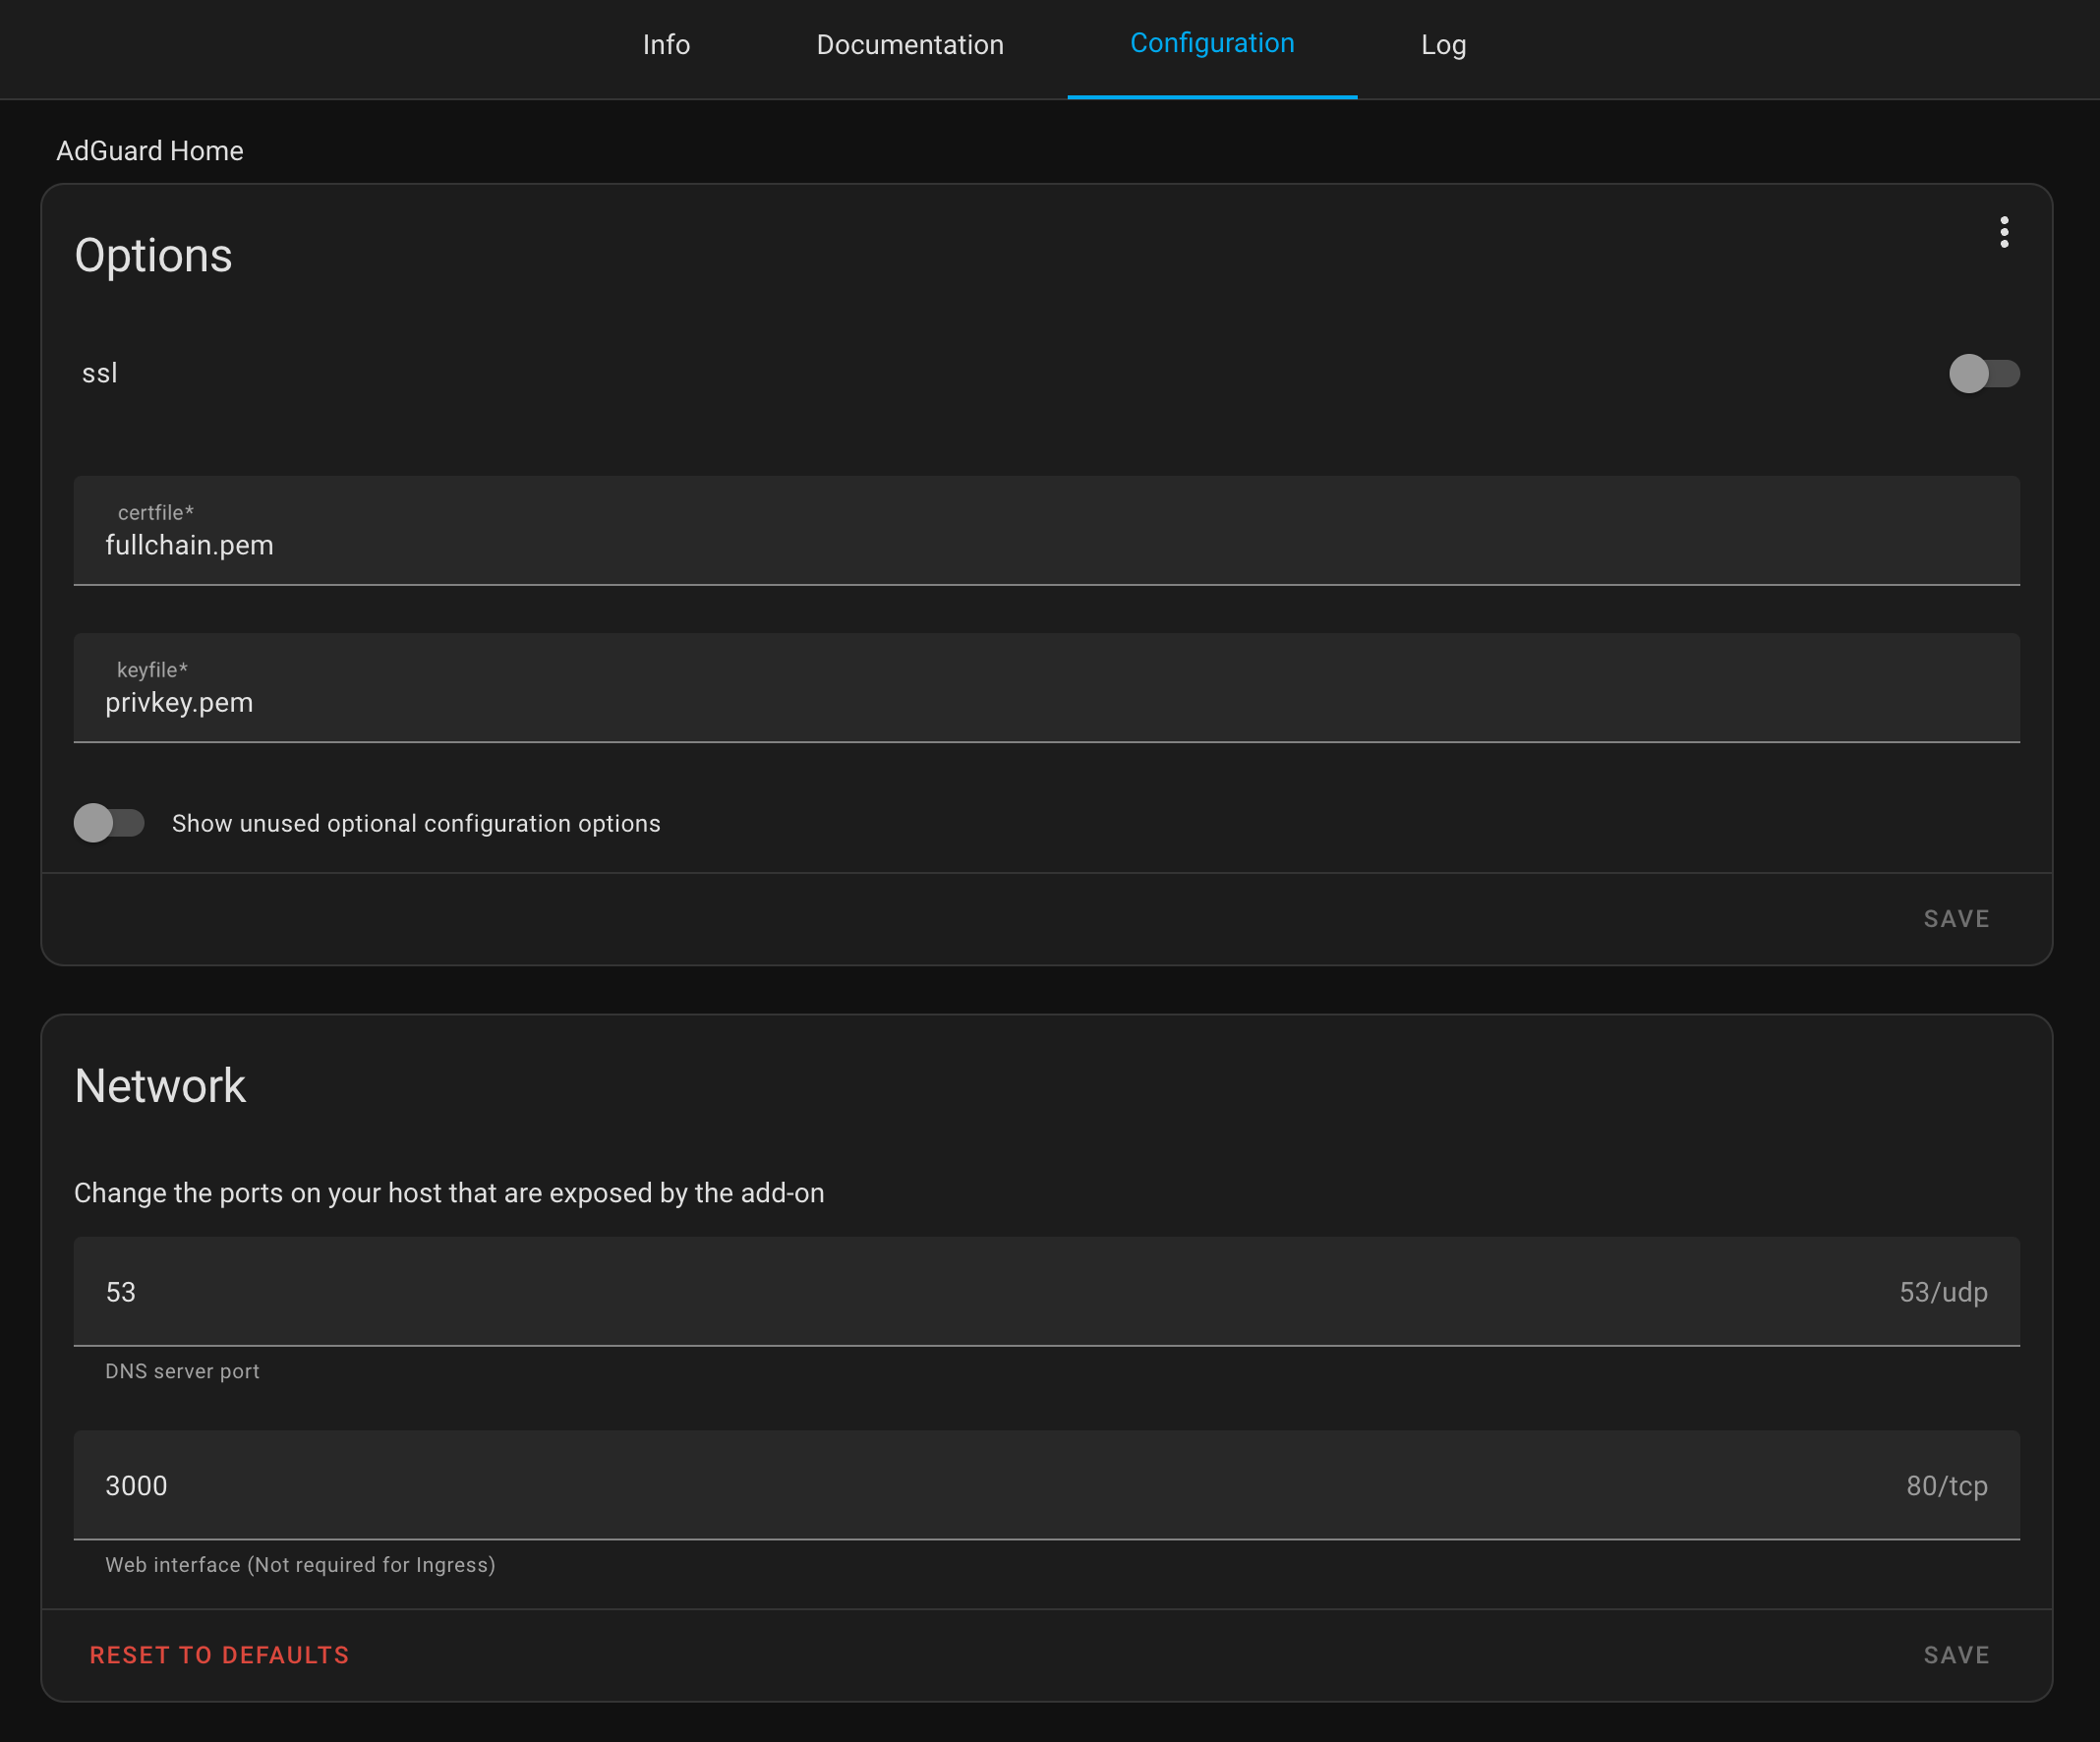
I recommend heading over to the Log tab on the add-on page to make sure the add-on started successfully and that the web service is running on port 3000.
Set-up a shell command in Home Assistant to interact with the AdGuard Home API
Next, edit the configuration.yaml file in Home Assistant and add the following shell command configuration:
command_line:
- switch:
name: Strict Entertainment Media
unique_id: strict_entertainment_media
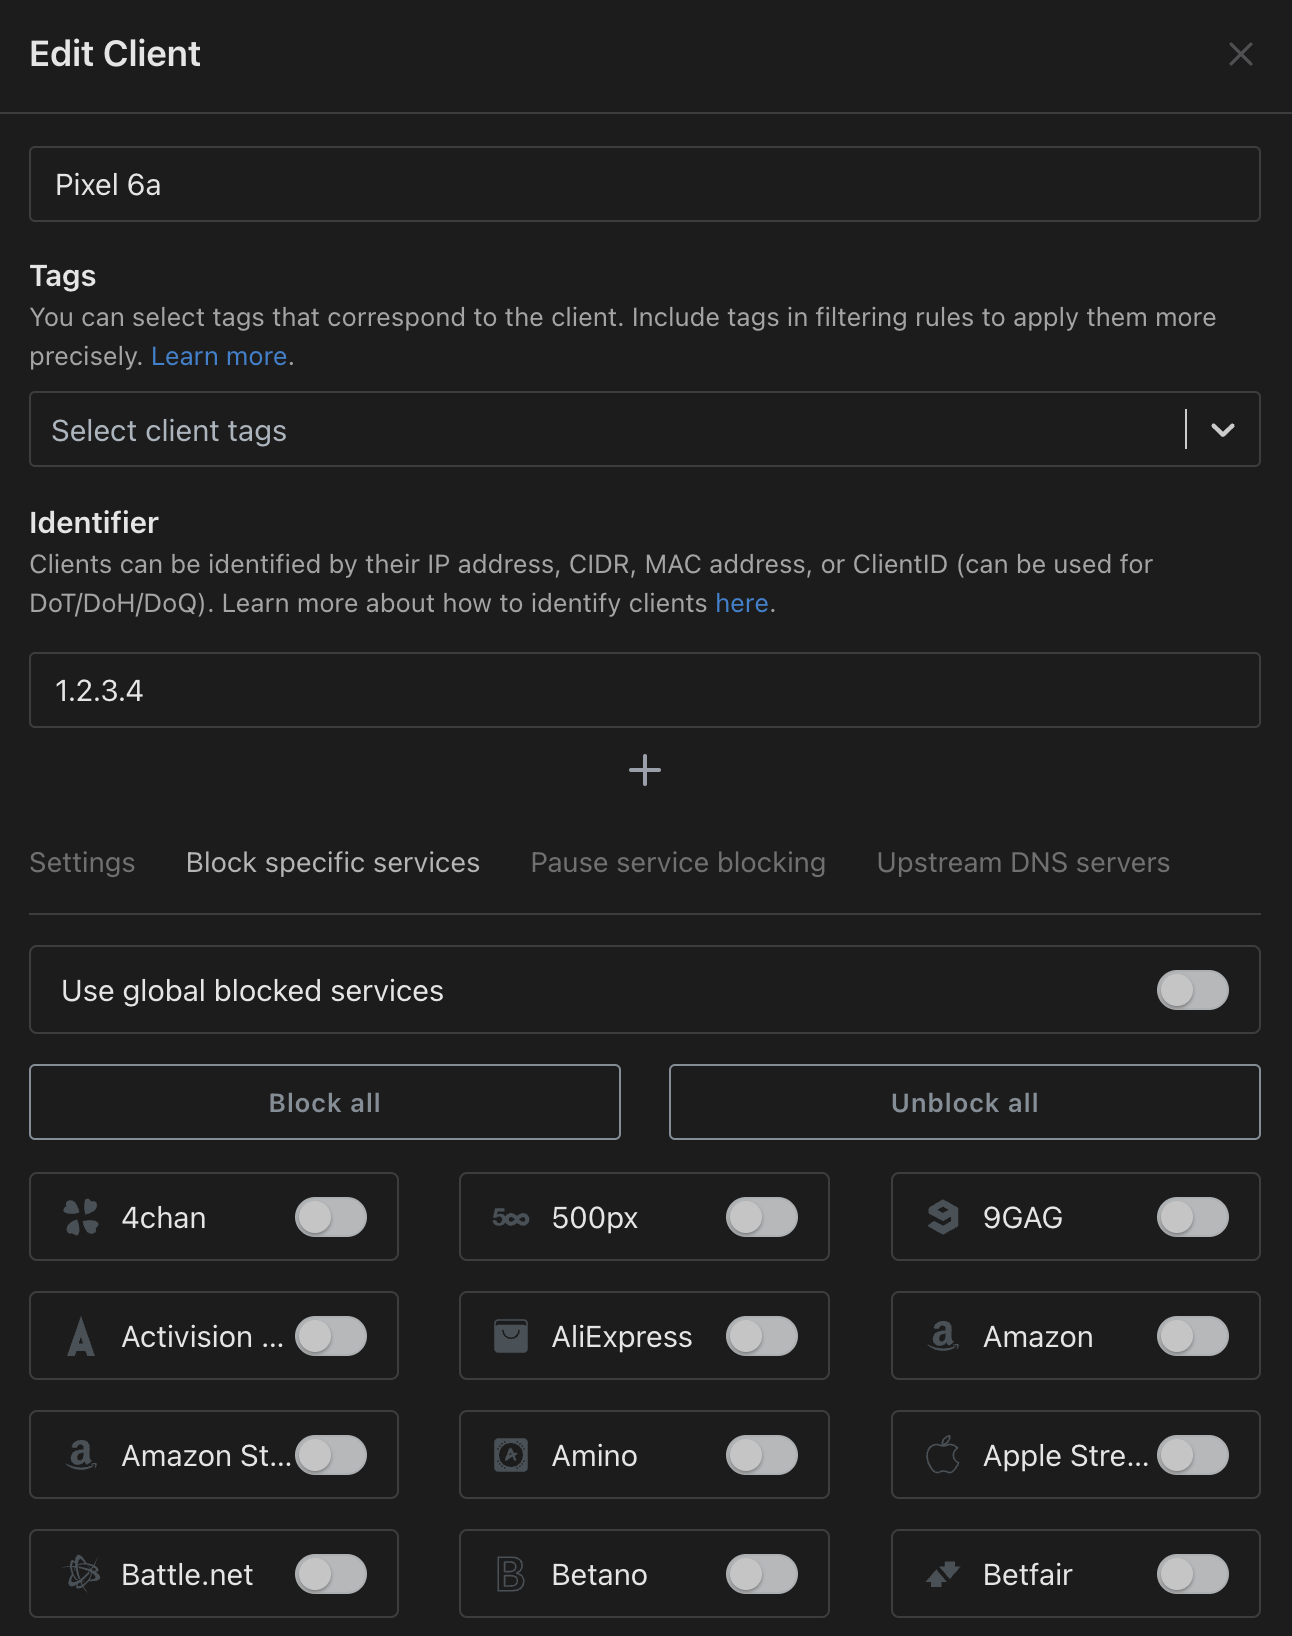
command_on: 'curl -X POST -m 10000 -H "content-Type:application/json" -s -u "username:password" http://a0d7b954-adguard:3000/control/clients/update -d "{\"name\": \"Pixel 6a\",\"data\":{\"name\":\"Pixel 6a\",\"ids\": [\"1.2.3.4\"],\"tags\": [],\"upstreams\": [],\"filtering_enabled\": true,\"parental_enabled\": true,\"safebrowsing_enabled\": true,\"safesearch_enabled\": true,\"use_global_blocked_services\": false,\"use_global_settings\": true, \"blocked_services\": [\"youtube\"]}}"'
command_off: 'curl -X POST -m 10000 -H "content-Type:application/json" -s -u "username:password" http://a0d7b954-adguard:3000/control/clients/update -d "{\"name\": \"Pixel 6a\",\"data\":{\"name\":\"Pixel 6a\",\"ids\": [\"1.2.3.4\"],\"tags\": [],\"upstreams\": [],\"filtering_enabled\": true,\"parental_enabled\": true,\"safebrowsing_enabled\": true,\"safesearch_enabled\": true,\"use_global_blocked_services\": true,\"use_global_settings\": true, \"blocked_services\": []}}"'In the above configuration, replace username and password with the credentials you use to login to the Home Assistant web interface, and a0d7b954-adguard with your AdGuard Home add-on hostname (this shouldn’t actually change for you, but just in case, you can find it on the add-on information page). The command_on and command_off are the curl commands that will be executed when the switch is turned on or off respectively.
The setup I have here is a switch that will block YouTube for a specific client IP address (that I configured in my router to be persistent per the mac-address, so it doesn’t change with a new DHCP lease). You can modify the blocked_services array to include other services you want to block, or remove the blocked_services array to unblock all services. Notice that I also specified the client name Pixel 6a which is the name of the client in AdGuard Home Persistent Client configuration that we showed earlier. Better to create that client manually first, then you can edit it using these APIs.
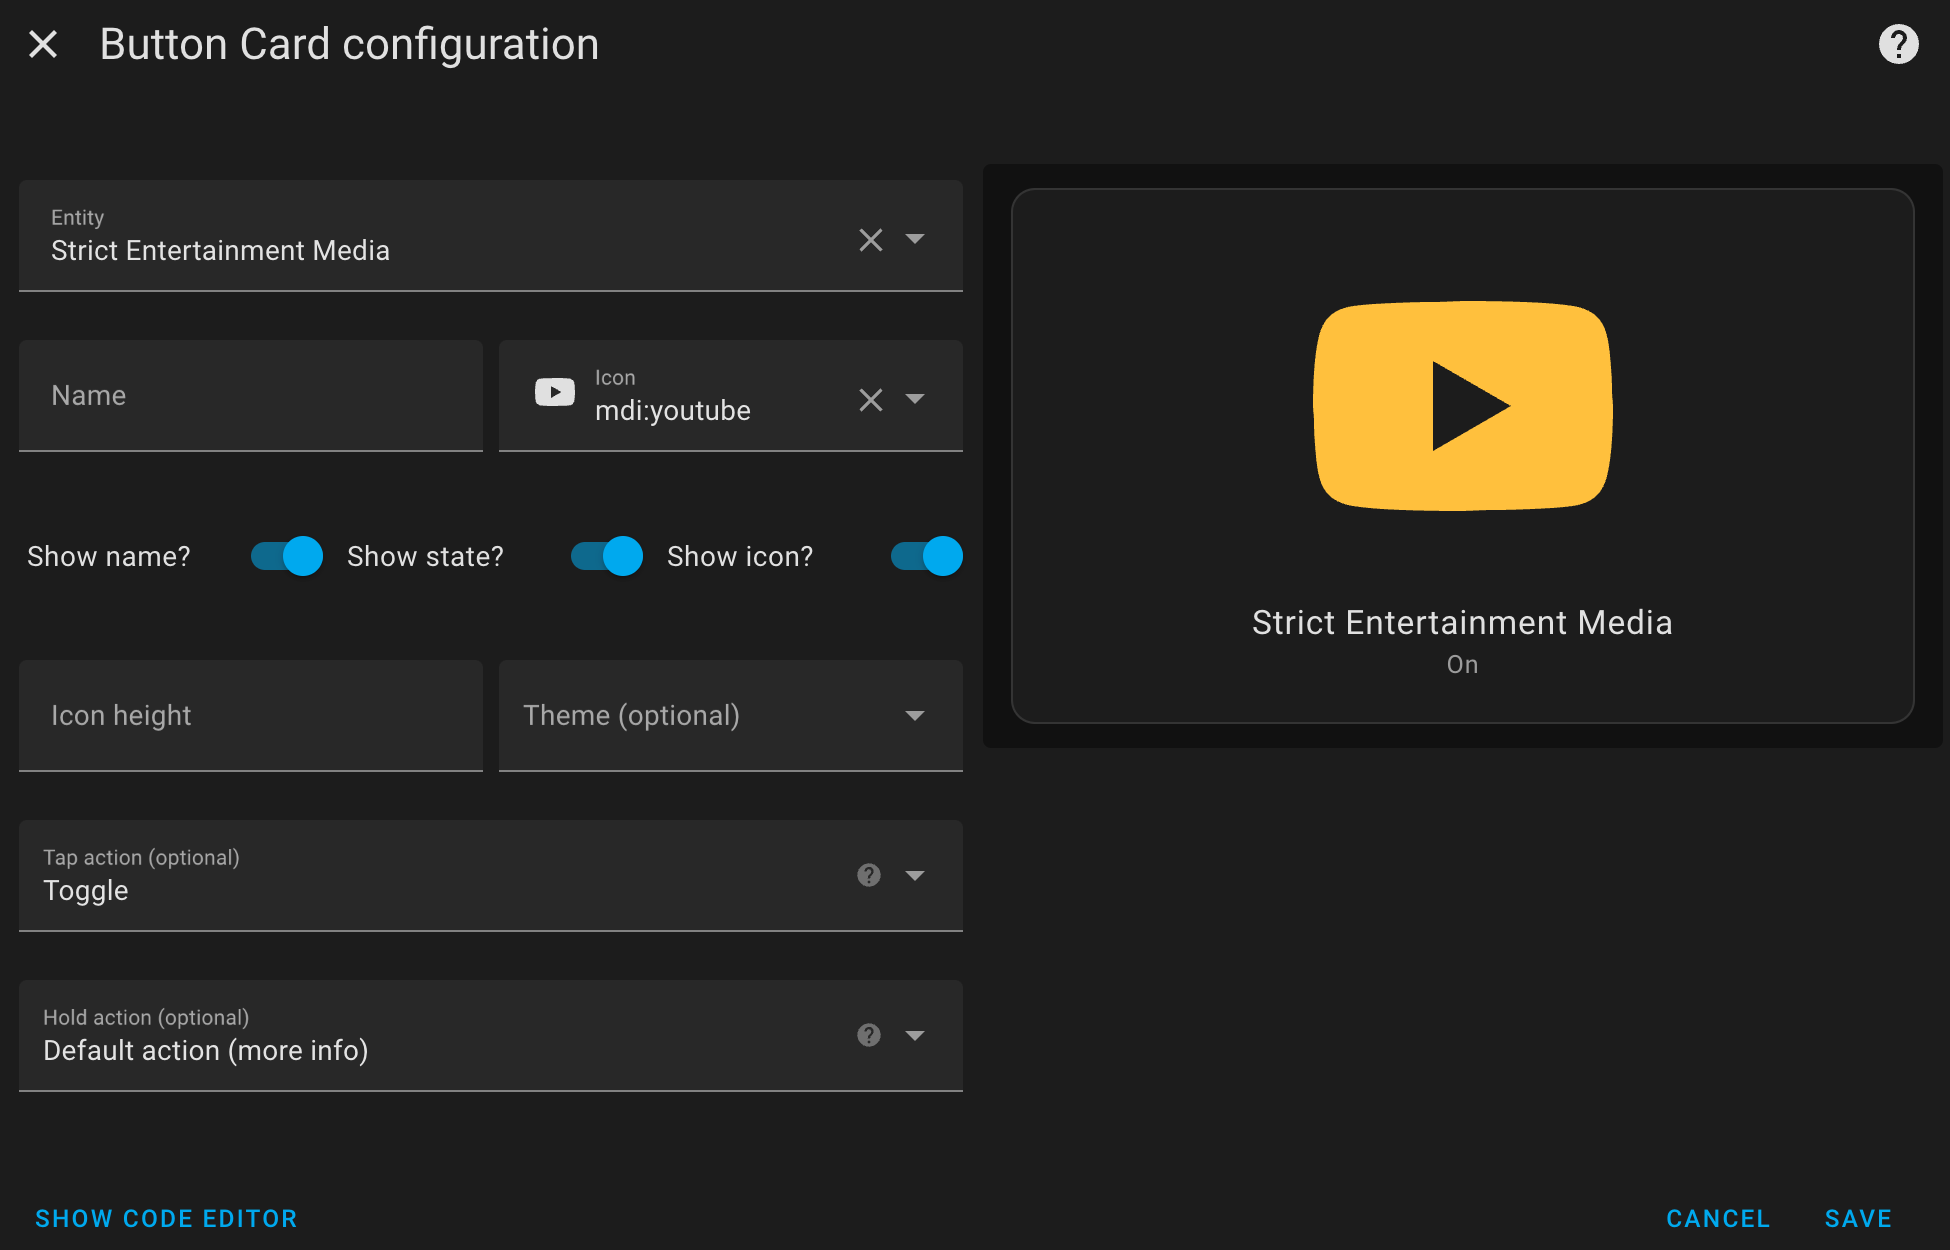
Add the switch to your Home Assistant Lovelace dashboard
Now that we added the switch that fires off the API commands to block YouTube for a specific client, we can add it to the Lovelace dashboard. Edit the Dashboard, click on Add Card, go to By Entity and type in the Strict Entertainment Media switch that we created earlier (or the name you chose to give it). Once it found it, add it to the dashboard.
You can then customize the type of entity card. I used a switch card, but you can use a button card or any other card that suits your needs. It looks like this: