~ 3 min read
How to Setup Google Cloud Project and Store Images in Google Cloud

In this write-up I will describe how to setup a Google Cloud project (on GCP) and use it to store images in Google Cloud Storage. If you’re looking into storing uploaded images via an S3-like alternative with Google through a step-by-step tutorial and this is a write-up for you.
Init a new Google Cloud project with the glcoud CLI
-
- Install the
gcloudCLI
- Install the
-
- Initiate a new project:
gcloud projects create credster --name="Credster project" --labels=type=credster -
- Set the active project from now on to the rest of the usage for
gcloud:
gcloud config set project PROJECT_ID - Set the active project from now on to the rest of the usage for
-
-
Link the project to a billing account so you can open up APIs. This has to be done from the UI as follows:
-
4.1. Choose the project to be active:
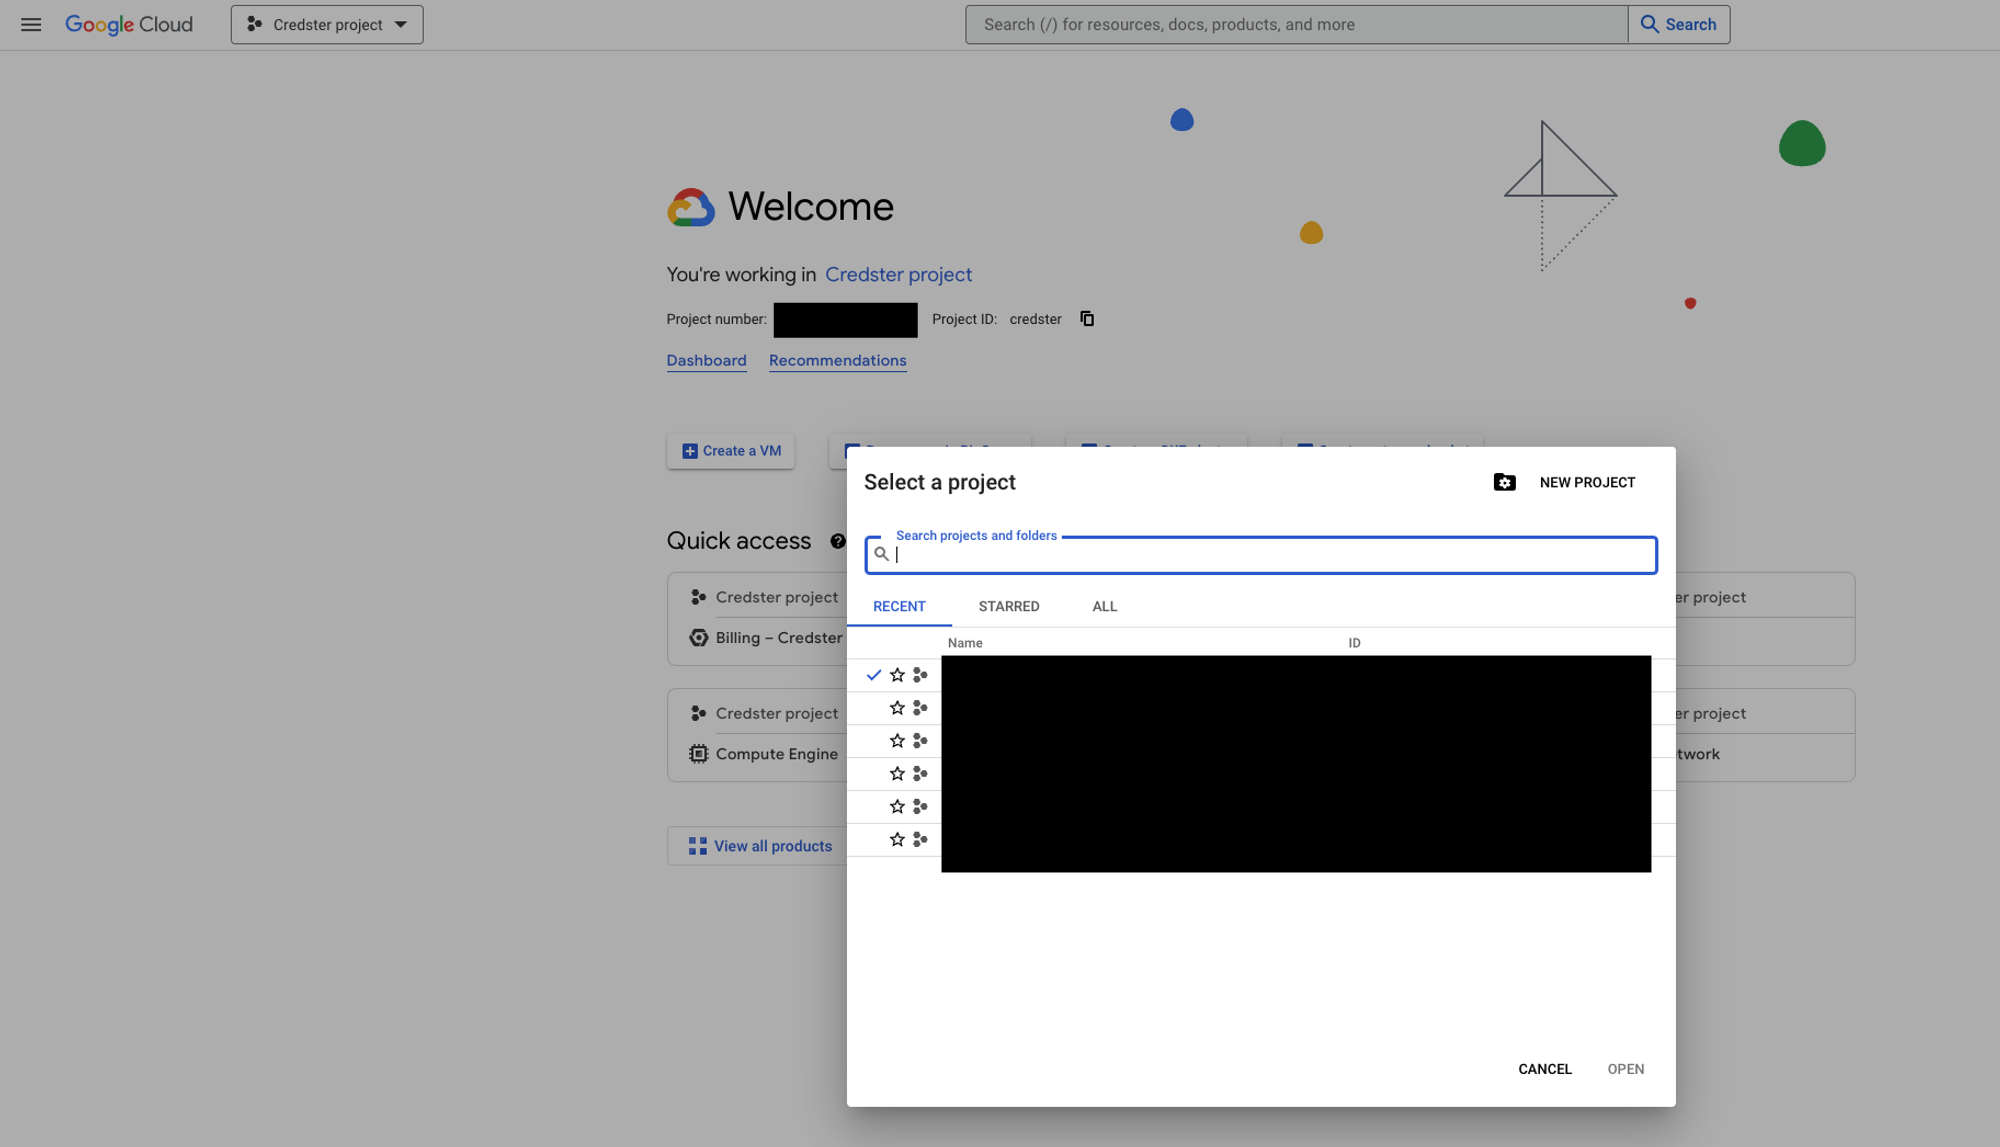
-
4.2. Click on
Billingfrom the available boxes: -
4.3. Then choose
Link a billing account:
-
4.4. Then set and choose the existing one already (if not, then create one):
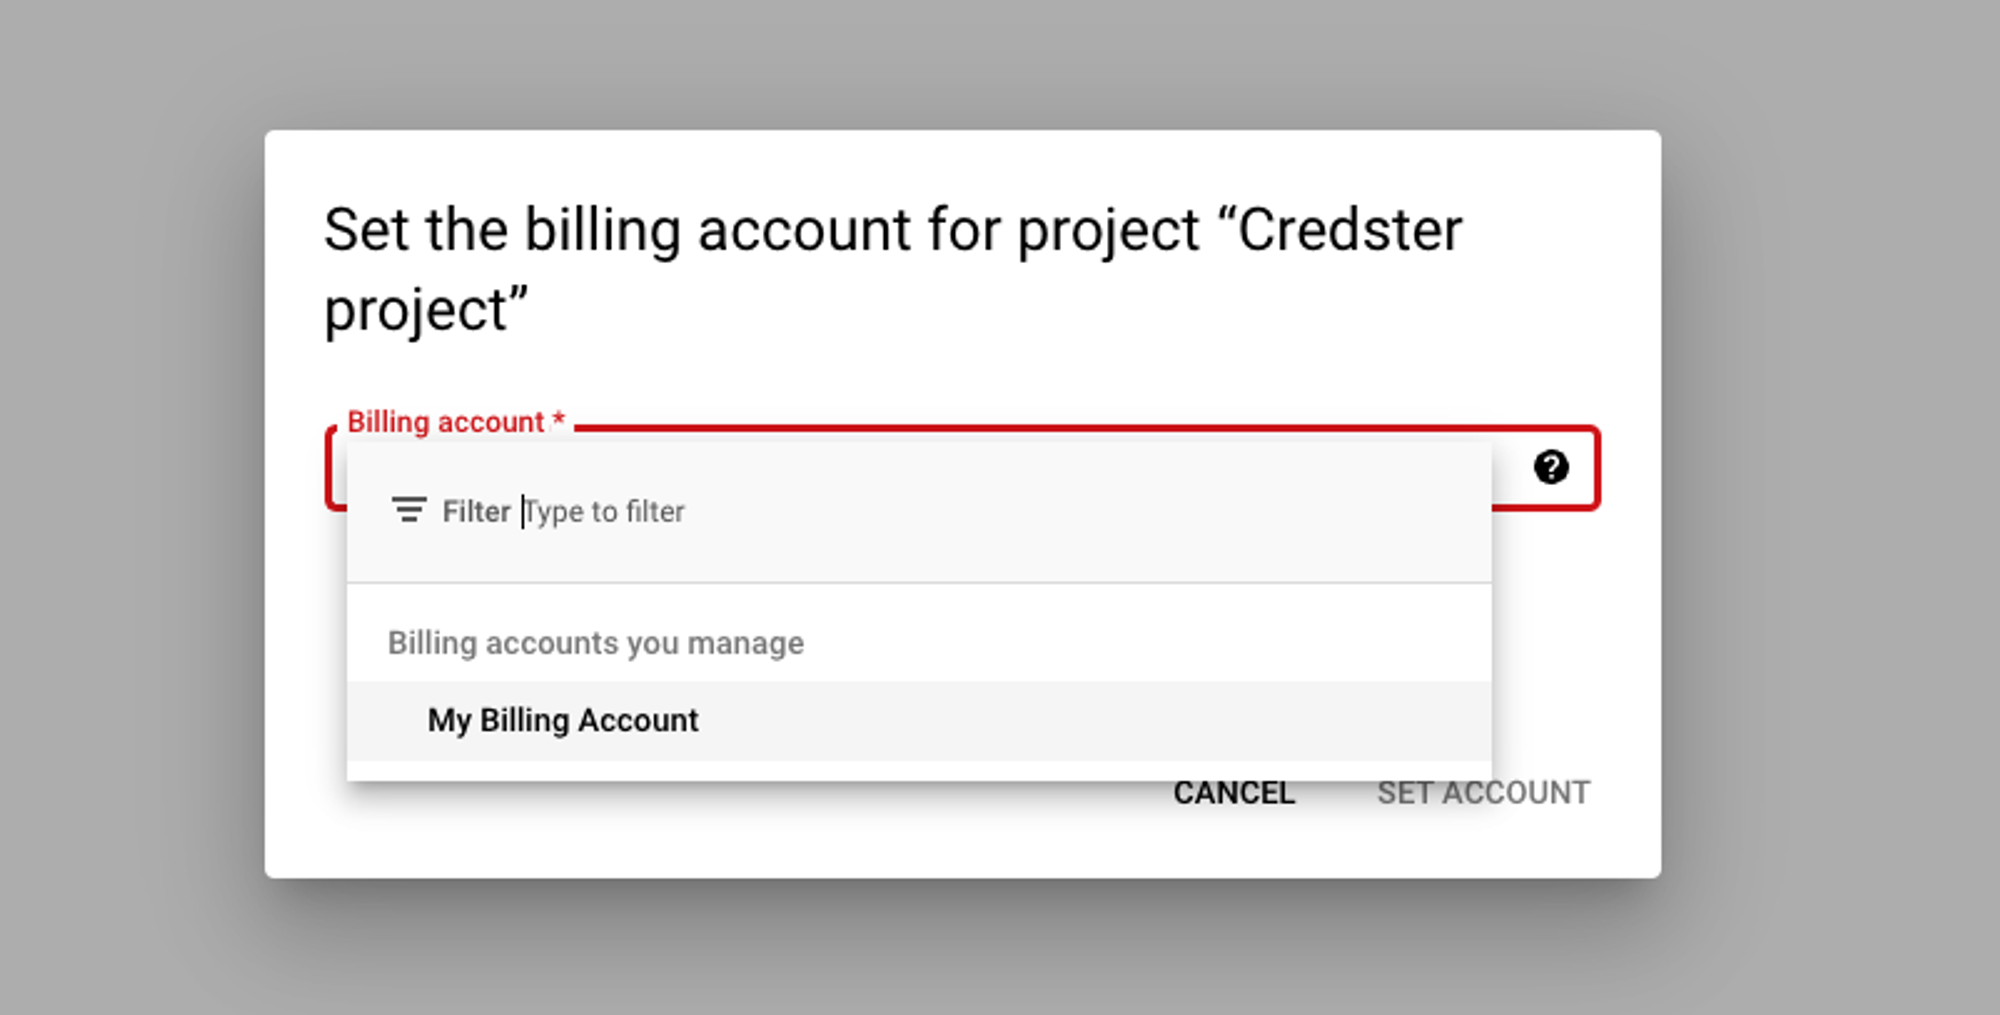
-
Store images in Google Cloud Storage
In this case we need to achieve 3 things:
-
- Create a bucket to hold all image files
-
- Create a credentials API key in JSON format that we can load on the backend server to access and perform operations on the storage bucket
-
- Update the bucket permissions to allow public access
Create images bucket
Create a bucket to hold uploaded images:
gcloud storage buckets create gs://cert_images --project credsterWith an output of:
Creating gs://cert_images/...Create service account for cloud storage


-
- Go to
API & Services→Credentialsand click onCreate Credentialsand chooseService account:
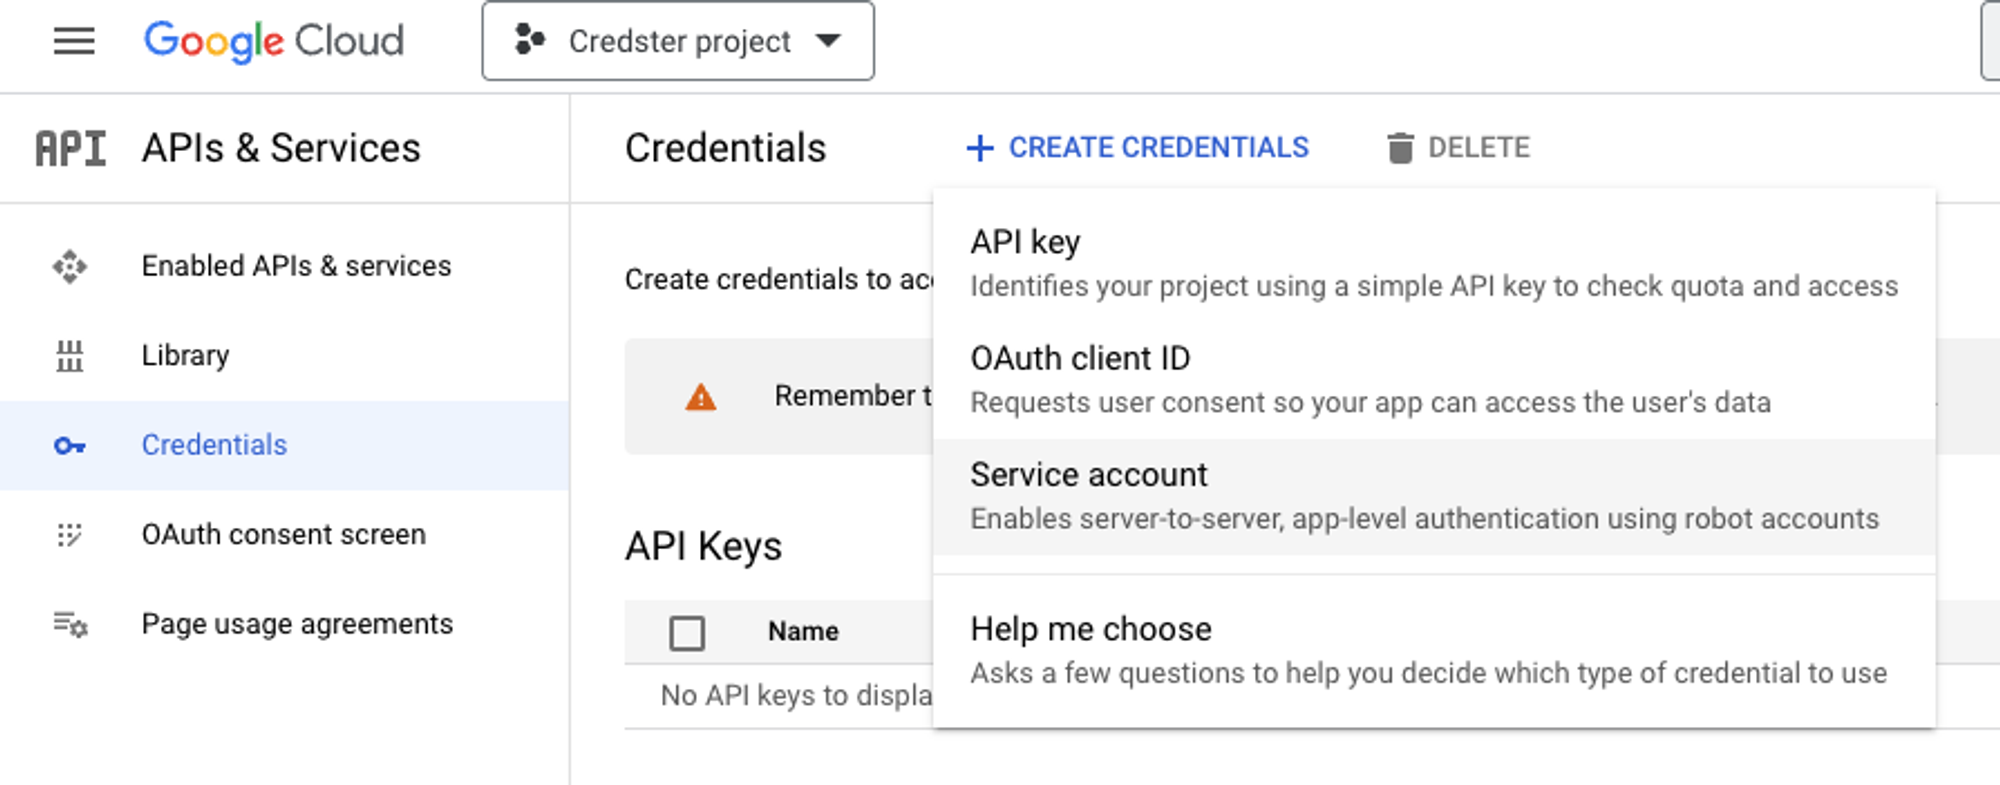
- Go to
-
- Give it a name (
backend-storage-access)
- Give it a name (
-
- Assign it the role
Storage admin:
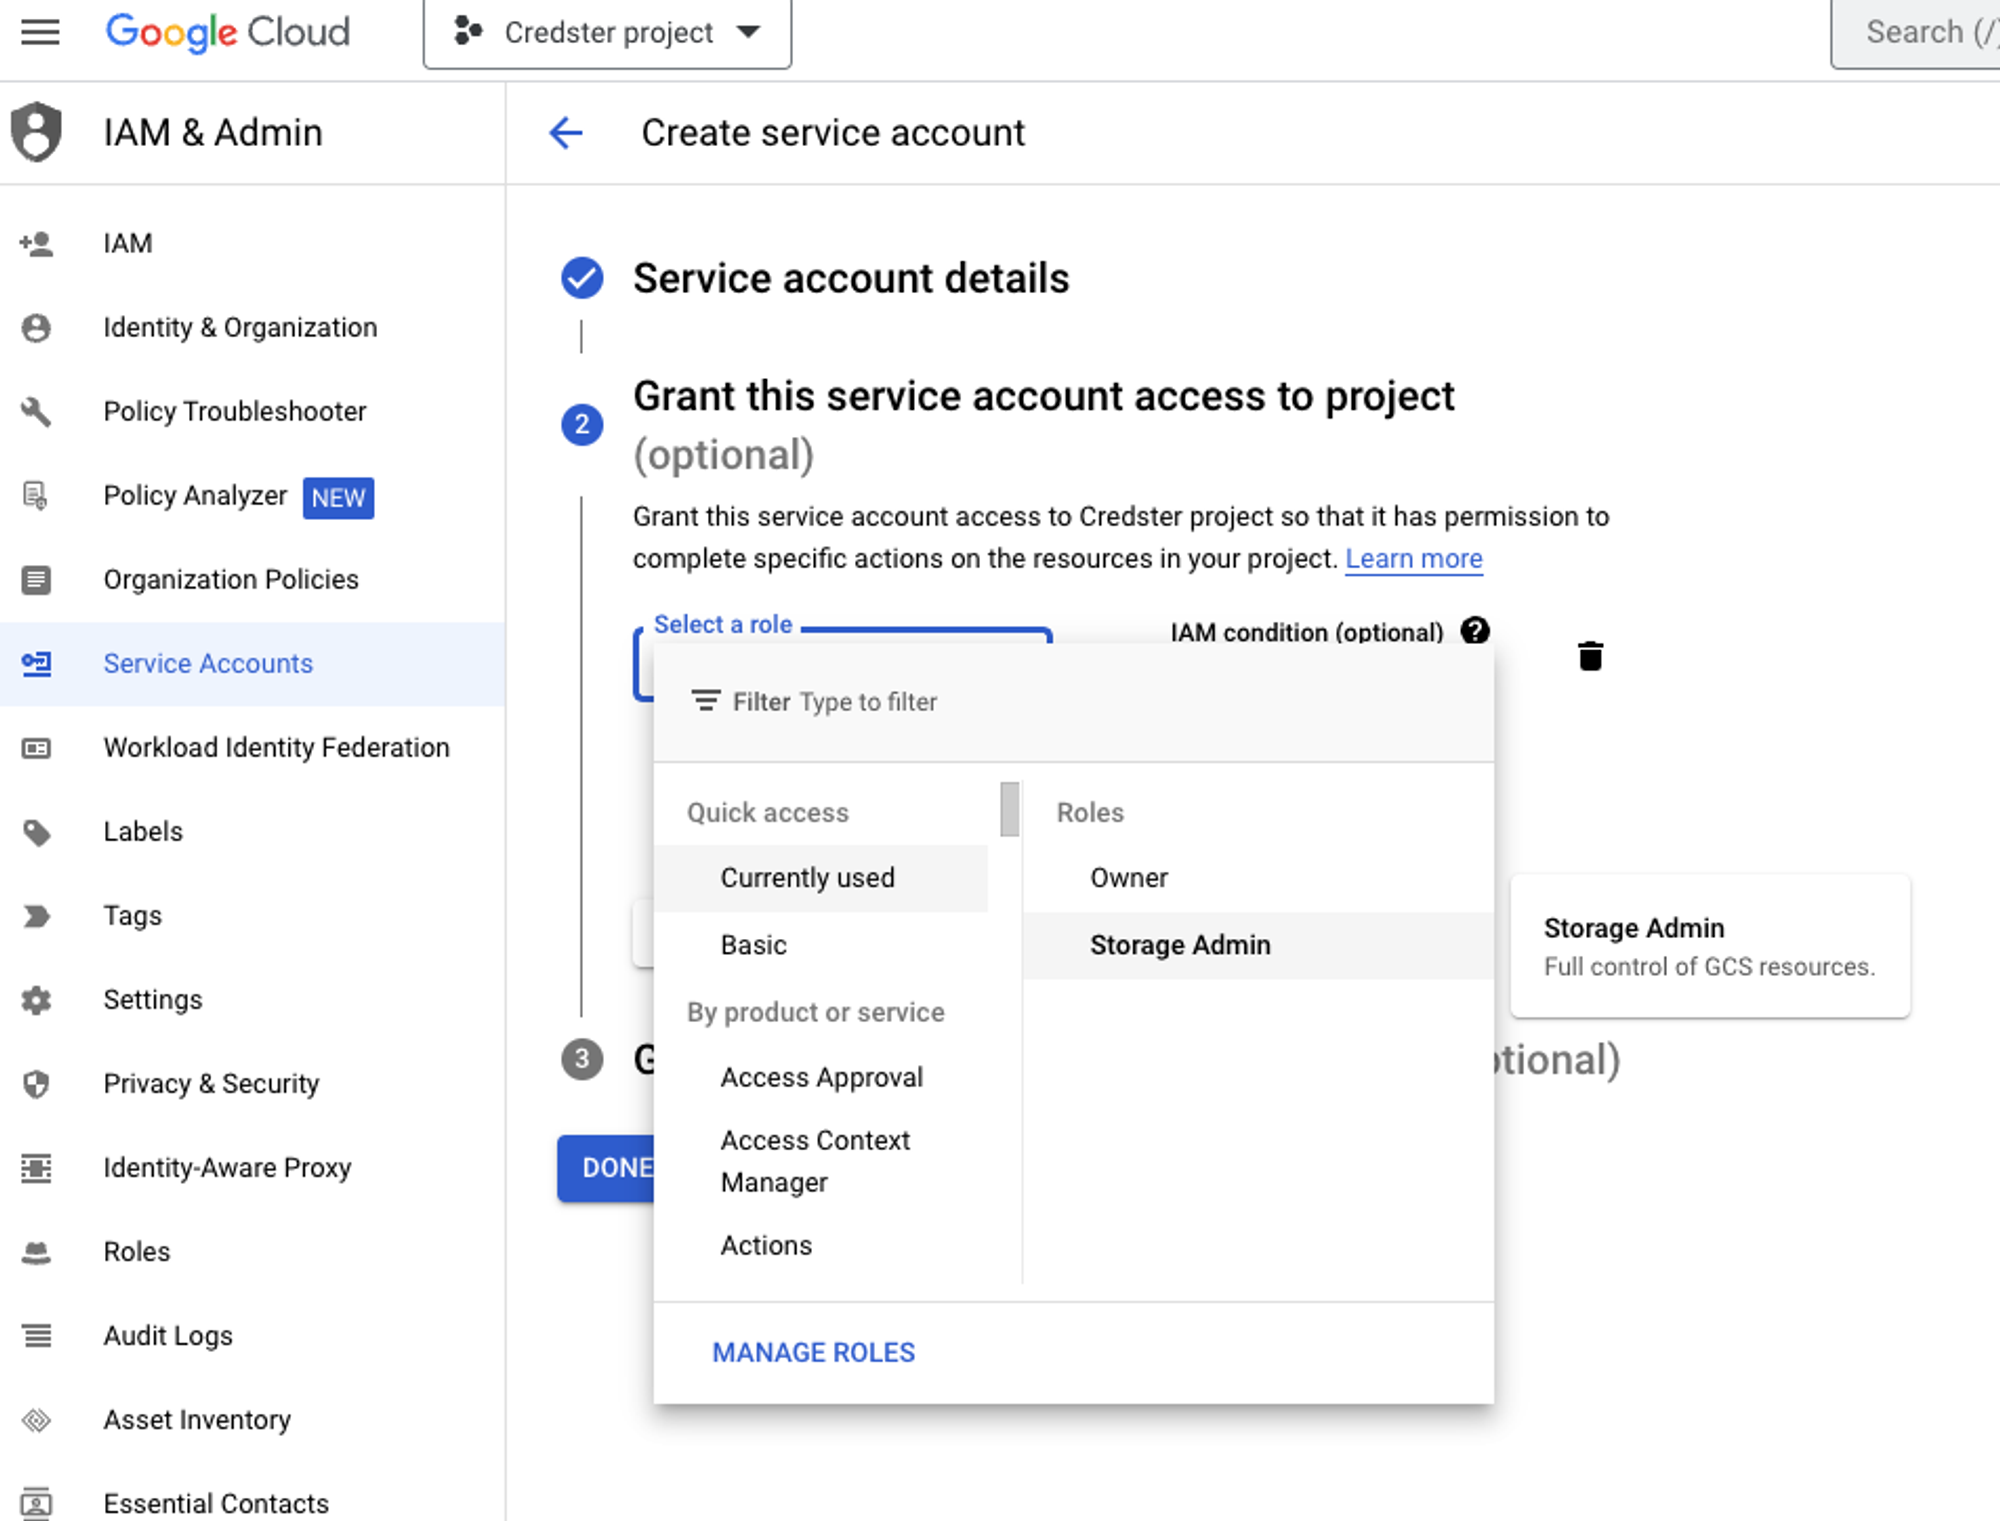
- Assign it the role
-
- Save it with
Done
- Save it with
-
- Now edit the service account and go to
KEYStab and create a new key and chooseJSONkey:
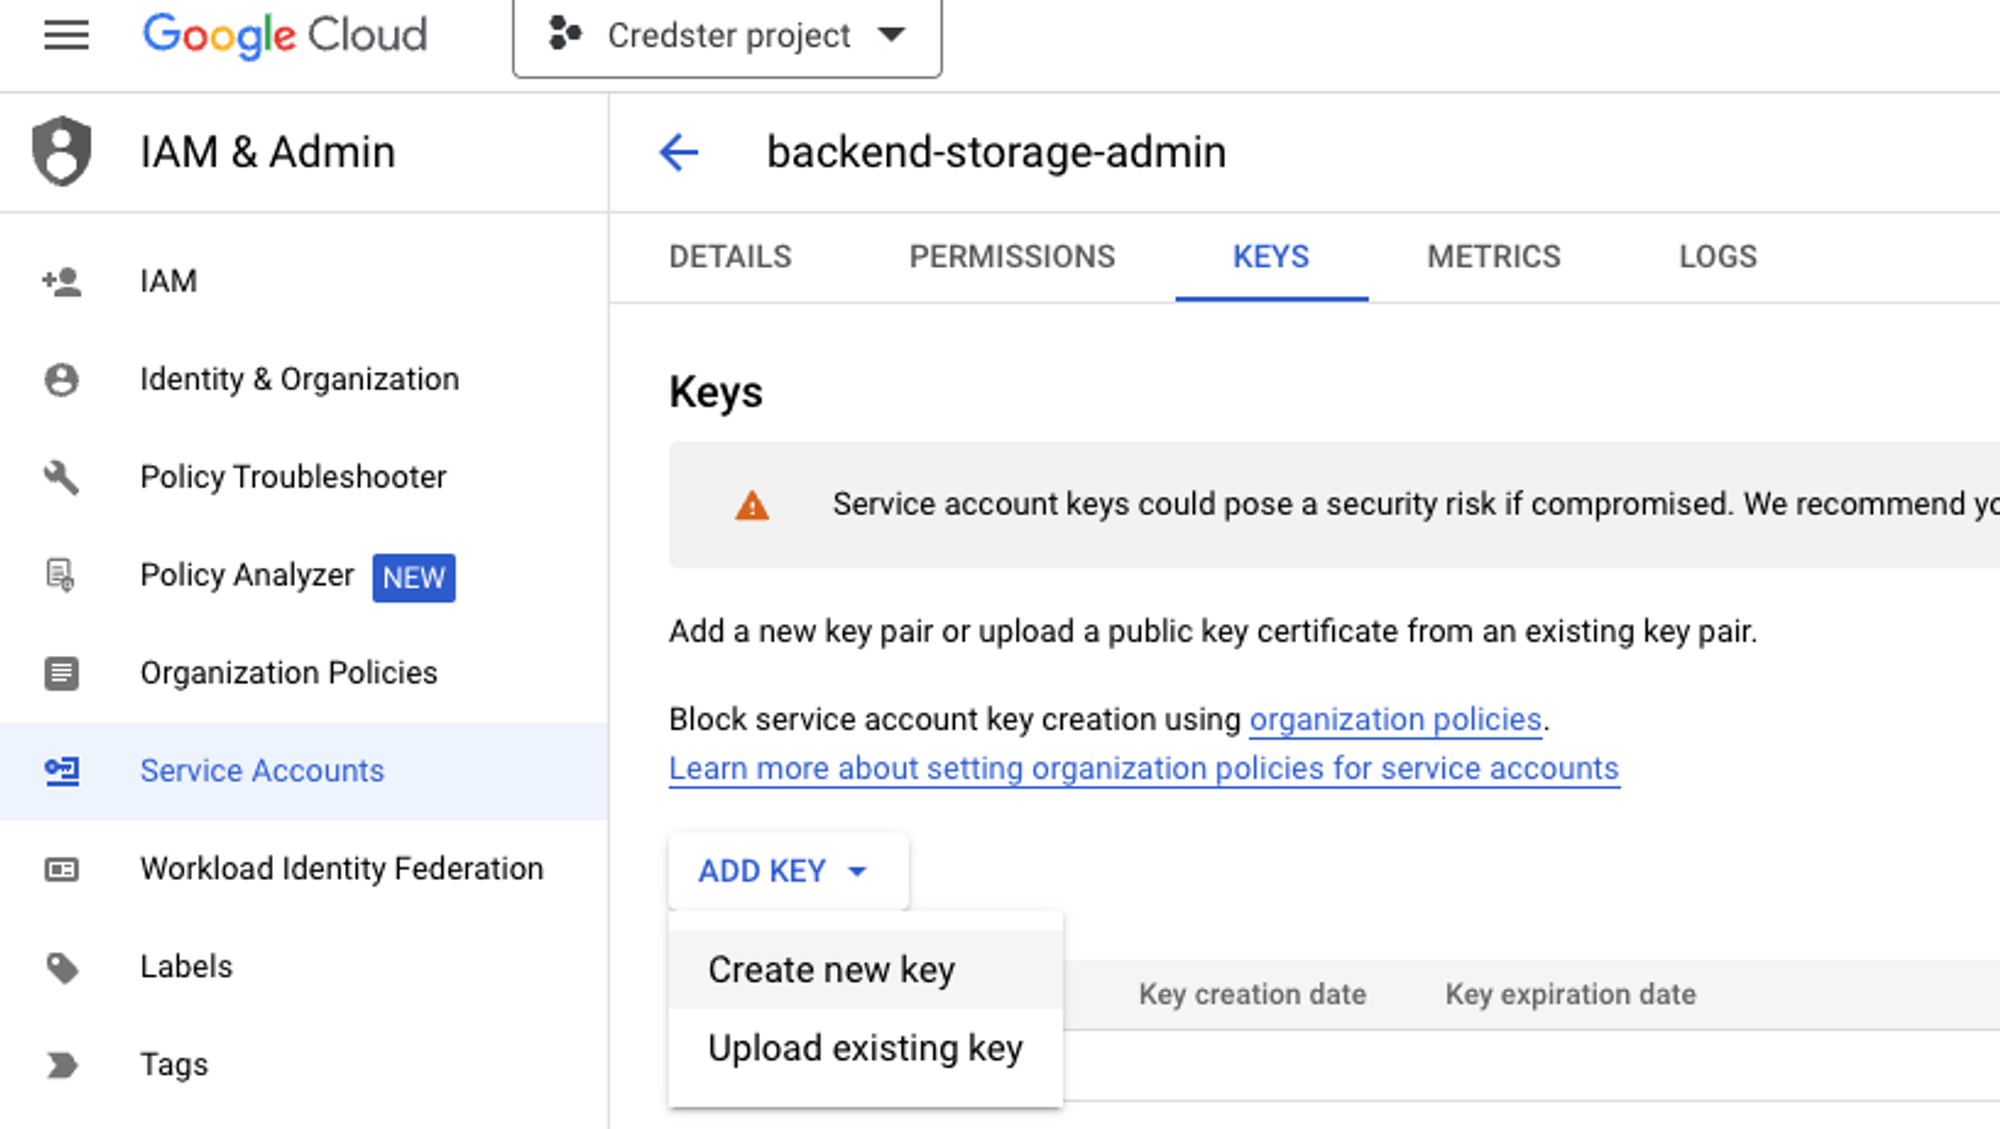
and then
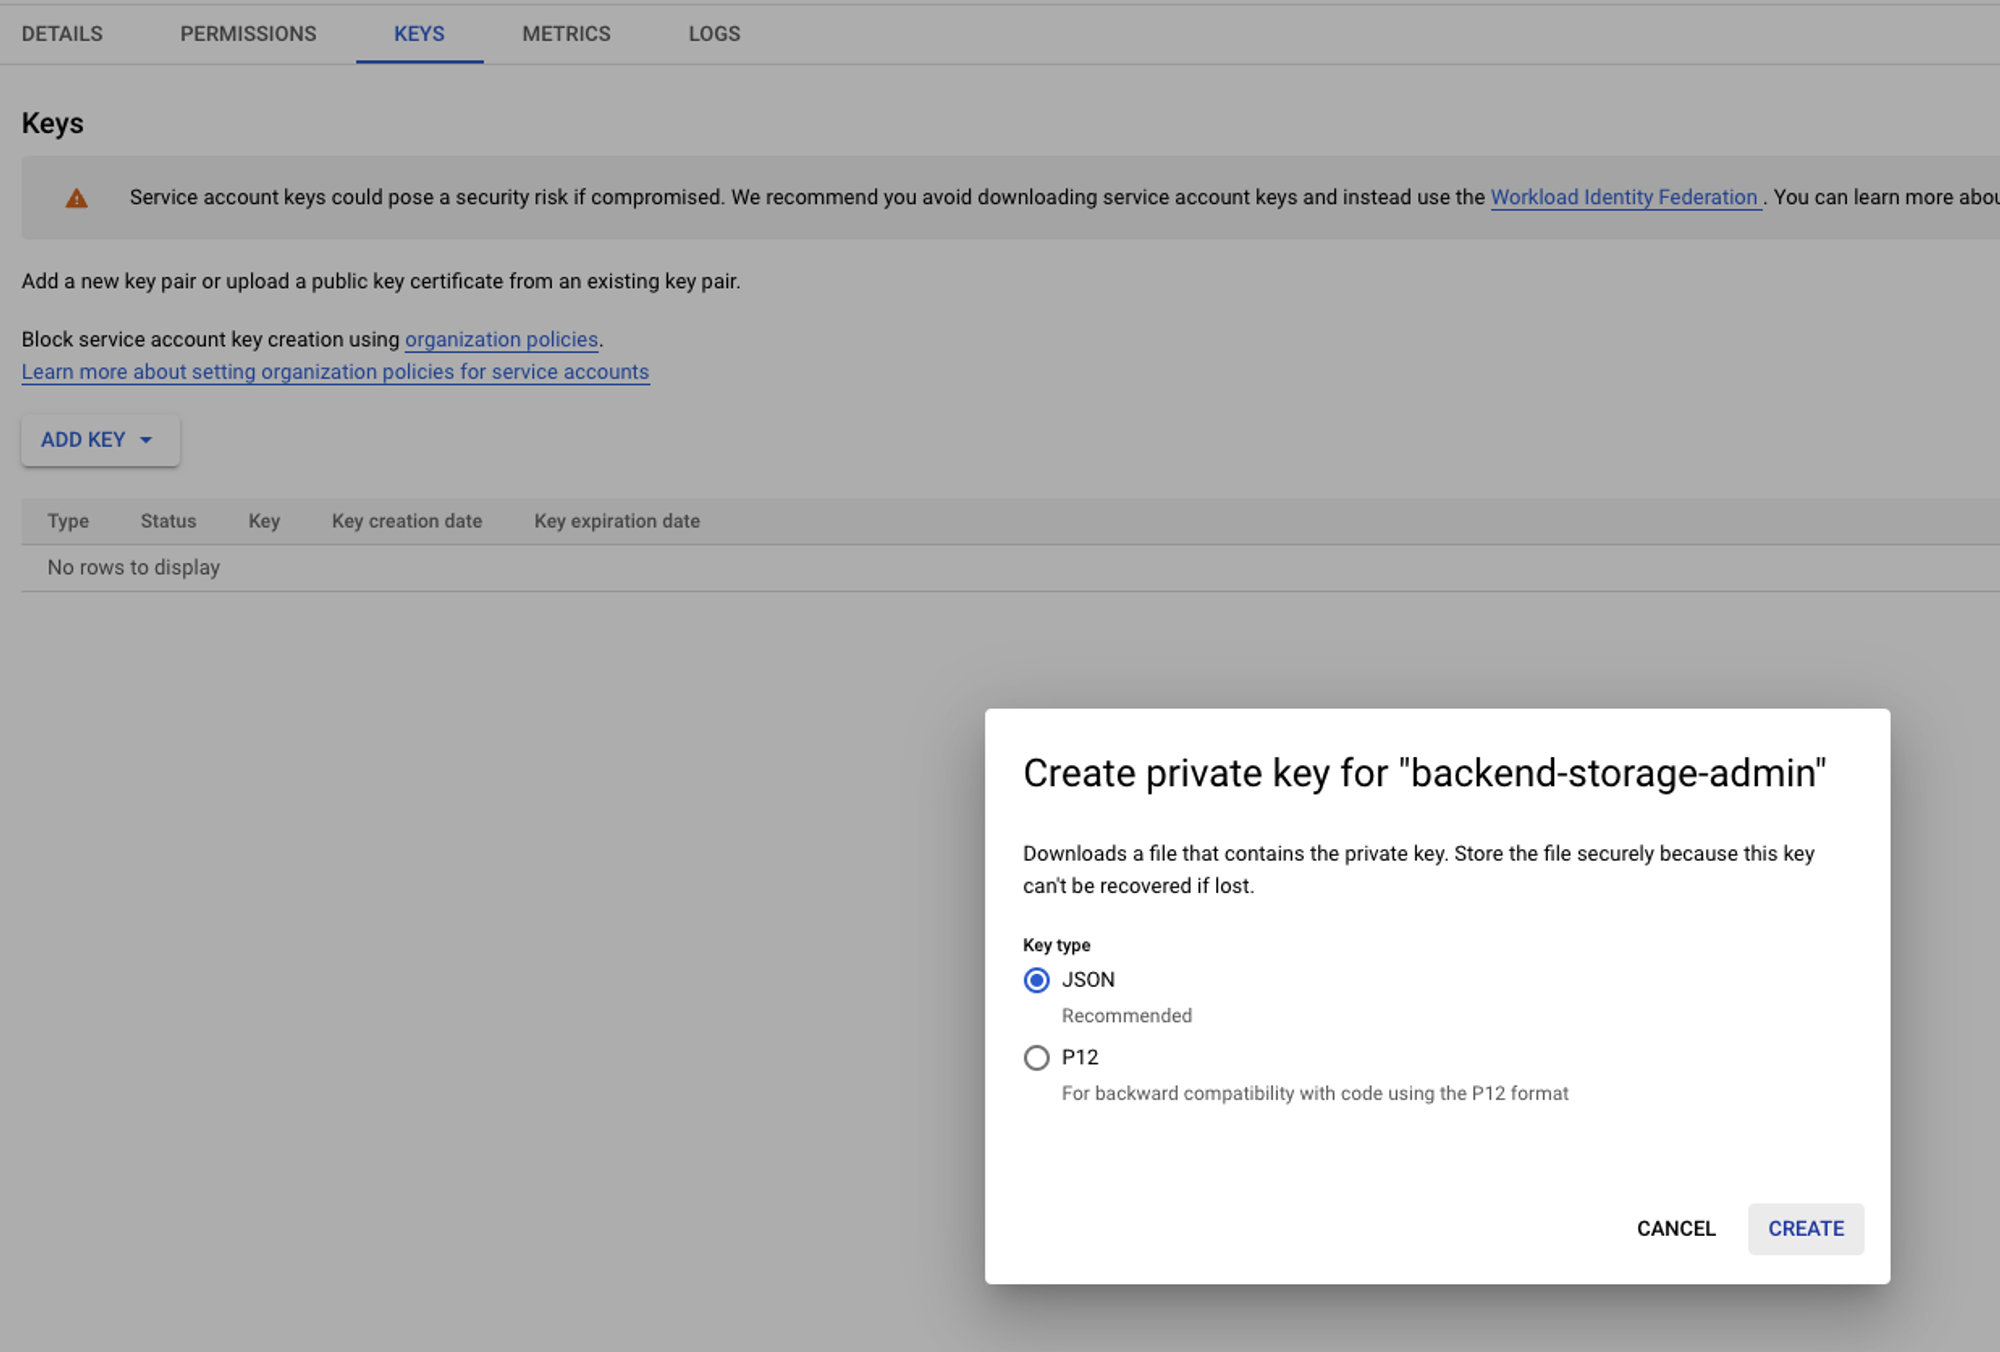
it now downloaded a JSON file to your computer and gave the following dialog to draw attention on keeping it secure:

- Now edit the service account and go to
Update bucket permissions to view-all
Add allUsers to members of the bucket resource and give them role Storage object viewer.
gsutil iam ch allUsers:objectViewer gs://$BUCKET_NAMEUpdate bucket permissions to allow CORS
Read about CORS here and why it is needed
Create a local temporary JSON file to define allowed CORS for the bucket called cors-bucket-policy.json
[
    {
      "origin": ["*"],
      "method": ["GET", "PUT"],
      "responseHeader": ["Content-Type"],
      "maxAgeSeconds": 3600
    }
]
We can then update it properly to something like this when we go to production:
[
    {
      "origin": ["<https://your-example-website.appspot.com>"],
      "method": ["GET", "PUT"],
      "responseHeader": ["Content-Type"],
      "maxAgeSeconds": 3600
    }
]
gcloud storage buckets update gs://$BUCKET_NAME --cors-file=$CORS_CONFIG_FILEView the CORS configuration for a bucket and confirm:
gcloud storage buckets describe gs://$BUCKET_NAME --format="default(cors)"If needed to remove CORS completely:
gcloud storage buckets update gs://$BUCKET_NAME --clear-corsGoogle Cloud Static Website Hosting
More information about Google Cloud static website hosting, with Firebase and otherwise can be found in the following resources:
